I hope this can be of help to someone falling into the maze of pickup replacement wiring. This reflects my experience to date.
Industry “convention” for humbucker pickups seems to be that the slug poles have “North” magnetic polarity, and the screw poles have “South” magnetic polarity. Some manufacturers do not follow this rule, and some pickups are manufactured for a specific application. (With single coil pickups, all bets are off: Seymour Duncan’s “Standard Polarity” single coils have South magnetic polarity, while DiMarzio “Standard” single coils have North polarity. Or, one manufacturer’s “reverse wound reverse polarity” pickup is another’s “standard polarity” pickup. Muddies the waters when shopping for replacements/upgrades and you think you need/do not need a “RWRP” single coil. DiMarzio single coil pickups with reverse polarity (“South” polarity) has a “S” in the item number, eg. DP175S.)
The following picture is from DiMarzio’s installation instructions, with the current DiMarzio lead colours. This layout applies to pickups with two screw coils as well.
Standard humbucker with coils connected in series:
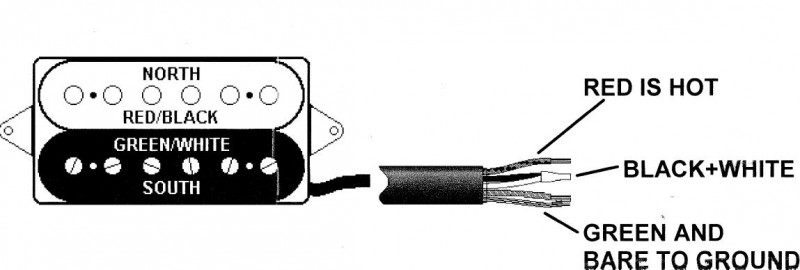
Standard Dimarzio Humbucker magnetic polarity:
Slug Coil: North Polarity (Slug tops are “North”)
Screw Coil: South Polarity (Screw tops are “South”)
“South” Coil: Green / White leads
“North” Coil: Red / Black leads
Leadout position is on “South” coil side, bottom right side when viewed from top as per drawing.
Coil polarity (refers to coil wind direction) for the leads are:
Red = +
Black = -
Green = -
White = +
(Other terms in use would include “start” and “end” wires, “clockwise”/“anticlockwise”, “hot”/”ground”, etc.)
To wire any two coils to be Humbucking, one would connect the one coil negative lead to other coil positive lead, with opposite magnetic polarities (one coil “North” and the other coil “South”). This also applies when wiring one coil of a humbucker to a single coil, or two “split” humbuckers to each other. This is referred to as being connected “humbucking, in-phase”.
This modified picture would reflect a “Reverse Polarity” DiMarzio Humbucker as I encountered in an Ibanez guitar:
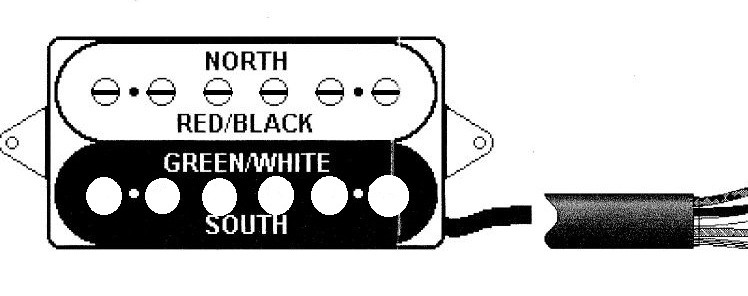
The Reversed Magnetic Polarity humbucker I encountered have the same leadout position convention as well as the same leadout colours and coil polarities. The “North” coil is the screws, and the “South” coil the slugs, with the leadout position on the South coil, as per the drawing, but now the slugs have the Green/White leads.
This photo shows three current production Dimarzio’s:
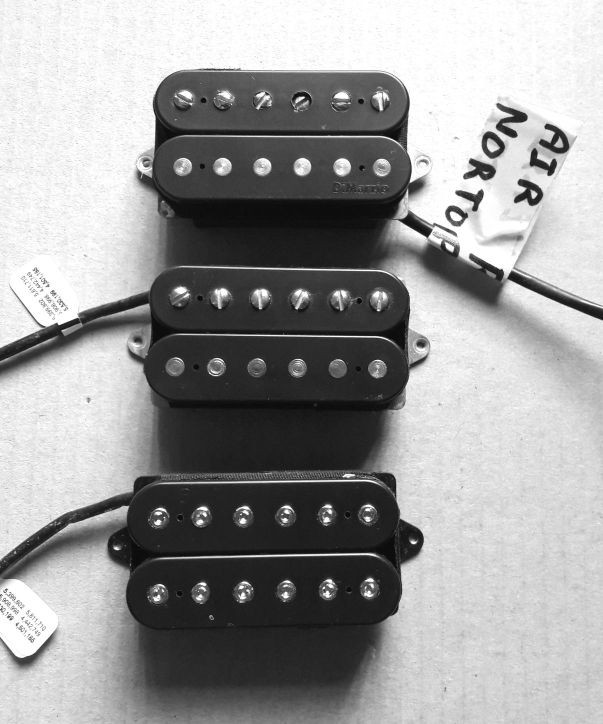
Top: DiMarzio Air Norton, reversed magnetic polarity, taken from an Ibanez, where it was a standard fitment in the neck position. Screw coil has “North” magnetic polarity. Standard catalogue item is not like this.
Center: Standard catalogue DiMarzio Air Classic Bridge. Screw coil has “South” magnetic polarity.
Bottom: Standard catalogue DiMarzio Liquifire. Both coils have screw poles. Top coil (at leadout) has “South” magnetic polarity.
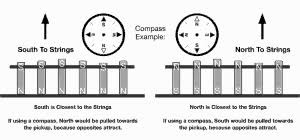
Magnetic polarity can be checked with a compass, and coil polarity with a multimeter.
(Look at
stewmac.com : understanding guitar wiring
humbuckersoup.com : Lindy Fralin Pickup Phase – What’s the Deal? and Guitar Pickup Wiring
for information.)
This picture shows the magnetic polarity test idea:
To establish coil polarity in terms of “+” and “-“ wires, use a multimeter set to DC Volts, milliVolt scale. Connect the multimeter positive (red) probe to one lead of the relevant coil, and the negative (black) probe to the other lead of the relevant coil. Press a screwdriver/steel item onto the relevant coil’s poles. If the multimeter (DC Volts) reading goes positive, and then goes negative when you remove the screwdriver, assign the relevant leads to be “+” where the multimeter red probe is connected, and “-“ where the black probe is connected. (If the multimeter goes negative, then positive, reverse the above assignments.)
I find it easier to work with the “+” / “-“ coil polarity concept than the “clockwise”/”anticlockwise”, “hot”/”ground” or “start”/”end” concepts.
As the DiMarzio Air Norton example above shows, buying secondhand off the internet might not deliver the pickup you thought you bought. This pickup is numbered “IHW93RBKL”, whereas the DiMarzio number is “DP193”. Air Norton it is, but you might have hassles fitting it as such.
The pickup leadout position is worthy of consideration:
This picture shows the conventional installation (using standard catalogue DiMarzio humbuckers):
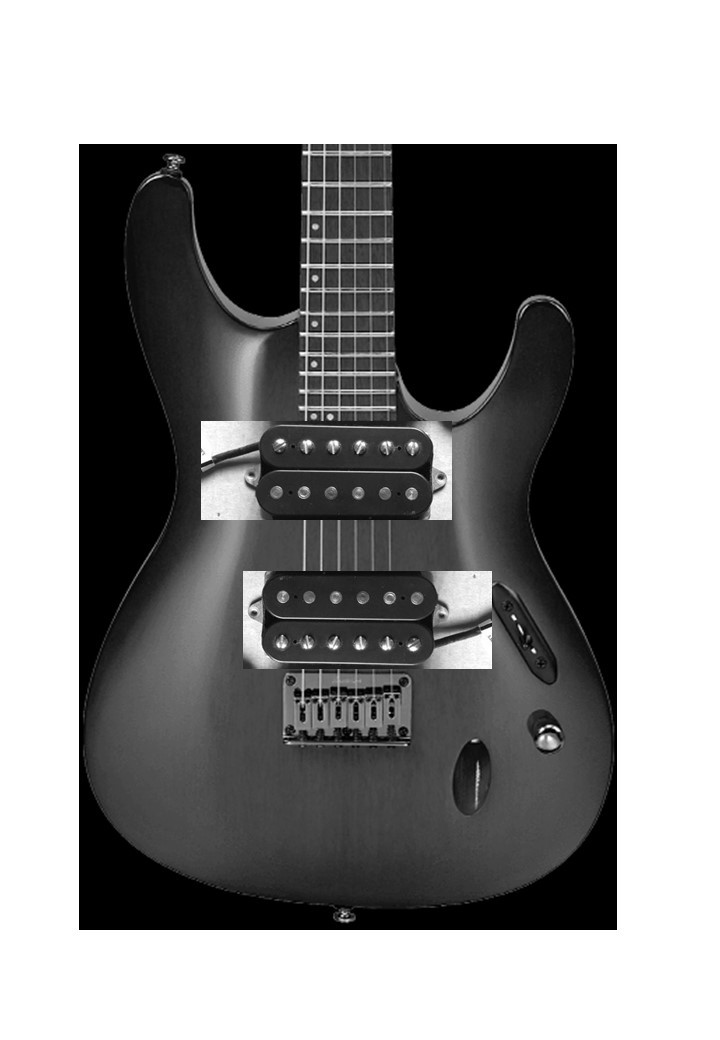
The neck pickup could lead to problems if the cutout in the body is not designed to route the leadout to the switch side. Ibanez “Prestige” direct mounted pickups for example.
This picture shows the setup with the “reverse polarity” Air Norton as fitted in the neck of the relevant Ibanez:
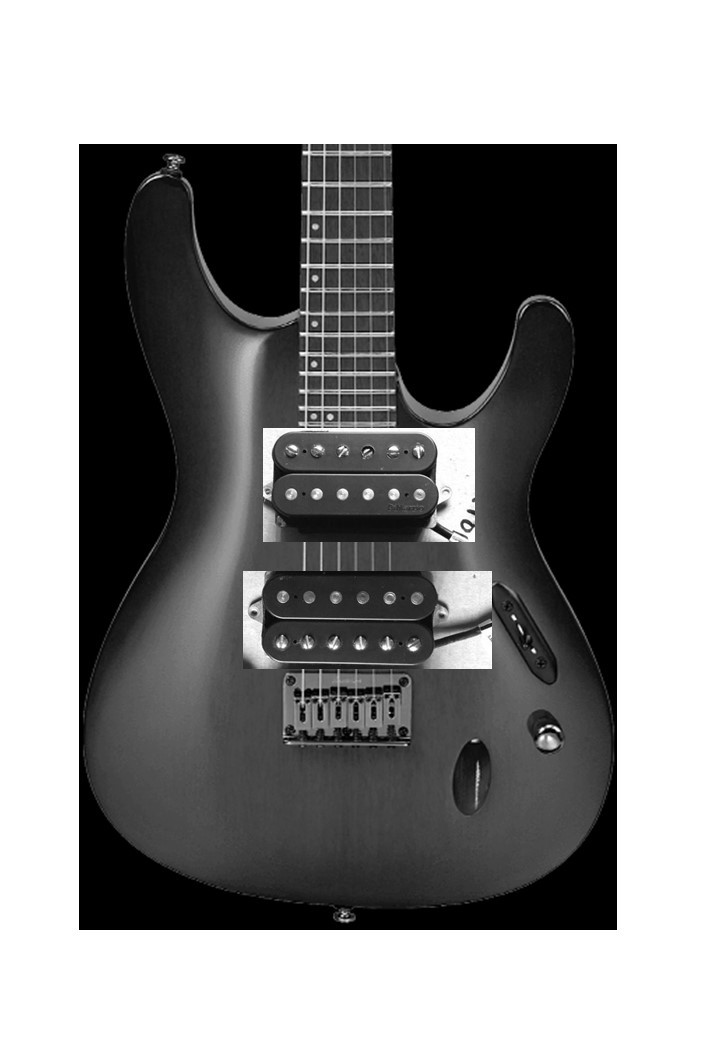
The Air Norton leadout is positioned just where it is needed. But –
This picture shows what happens when that Air Norton is installed at the bridge, in the conventional orientation:
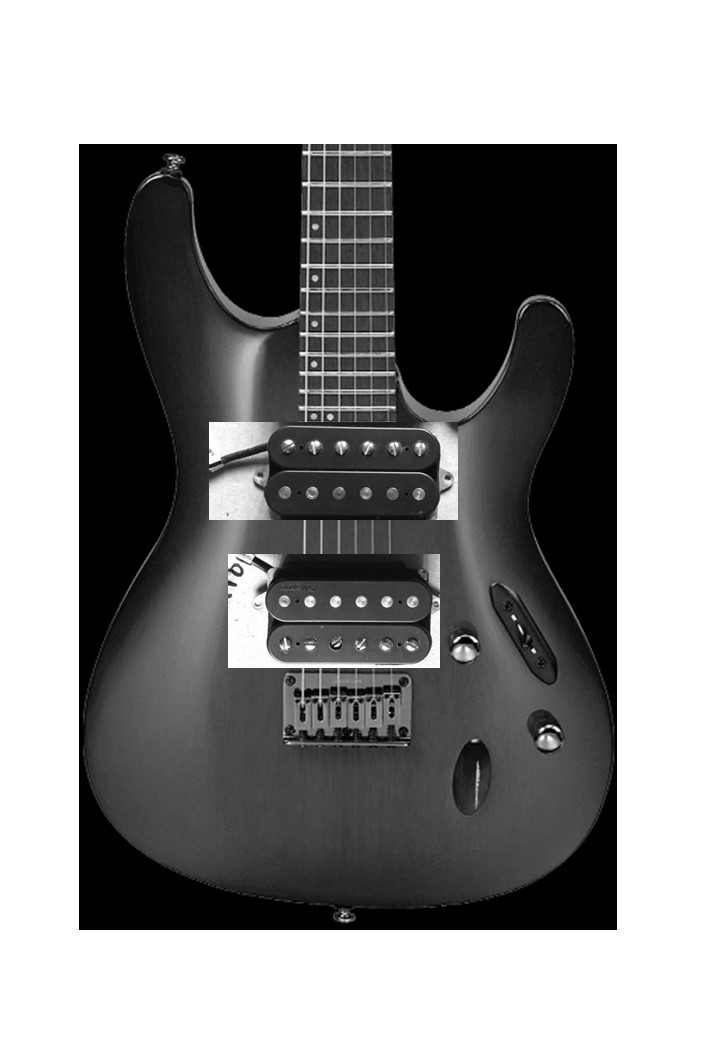
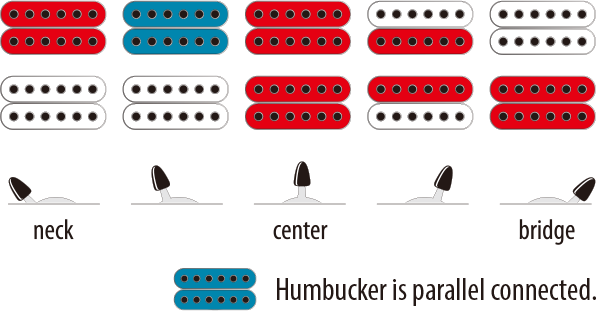
The leadout is in the “wrong” place, and, as explained earlier, the magnetic polarities are reversed from the conventional way of doing it. Whether this matters depends on the switching arrangement you go for. You will not get this lekker Ibanez one without juggling leadout colours:
I have no experience with other guitars or pickups, but looking at Seymour Duncan pickup dimension drawings, it seems as if the Duncan has the leadout in the same position as the Dimarzio:
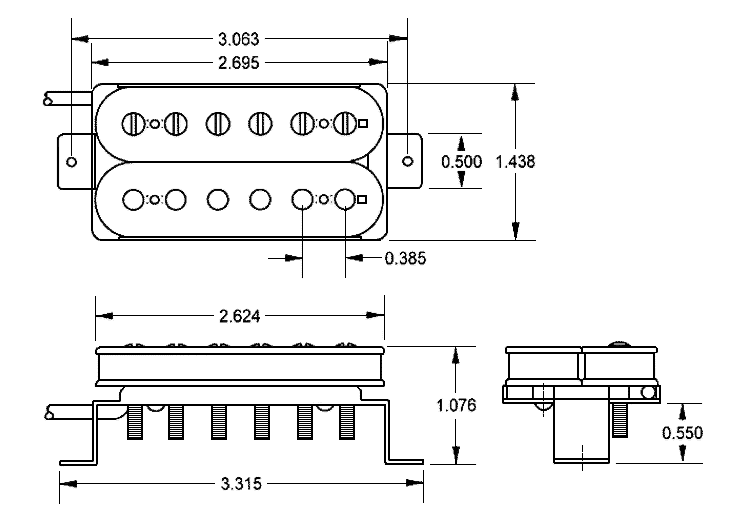
This is some challenges you may face before even thinking about switch wiring. Switch wiring will greatly expand your vocabulary.