Well, this post is about 6 months too late, but I have finally decided to get my backside moving and just do it.
Let me say that the idea with this was not to spend a bunch of money but to use what I had and see if the concept would work. Well, I am glad to say it did. ?
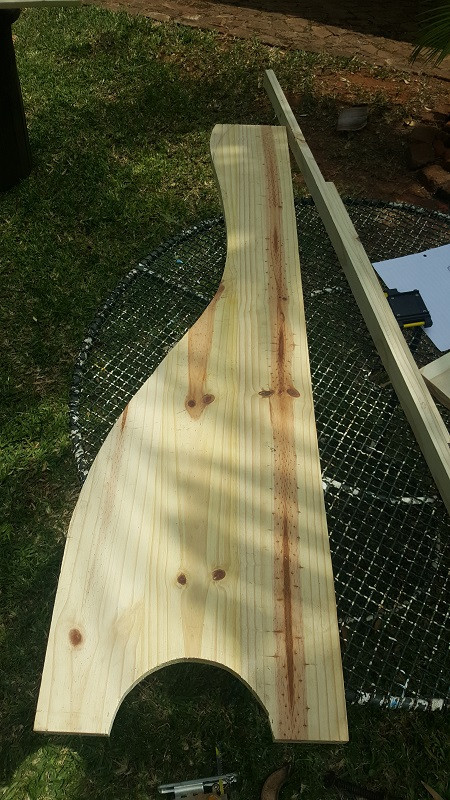
I started with one piece of pine shelving – 300mm X 2400mm. I cut this in half so I had two pieces of 1200mm each.

I used a little round plastic plate to measure where I would do the cut out for the feet.

I then drew a ‘design’ on the first piece of wood and proceeded to cut out the shape with an electric figure saw.

I then did a second design inside the already cut out one. And cut that out as well so I was left with a ‘frame’ of sorts.

I placed this frame on top of the 2nd piece of wood and drew the outline onto the 2nd piece and cut out the entire thing again. (So now I had two identical pieces)


Next I used two smaller pieces of 150mm X 800mm and positioned them on the bottom of the two frames and fastened them with only one screw each. The reason for this was 1) to get the frames together and 2) so that I could measure and adjust the angle where the guitars would sit.

I then use another small piece of about 120mm X 800mm for the top of the frame. I measured with my shortest and tallest guitars and placed that piece kind of at the lowest end.

I then did 5 cut outs with the figure saw. This would be the ‘slots’ where the guitar necks would fit into.

Next was a quick coat of stain varnish (teak stain) which I sanded down when dry and finished with a last varnish only coat.

Finally I added some old ‘carpet’ I had lying around for the area where the guitars would stand on (glued firmly in place) and some ‘red felt’ to the neck slots, cut to size and glued in. And Voila – one finished guitar stand, nice and solid!

Total time spent was about 5 hours.
I am very satisfied with the way this came out!